
A printable canvas sample should be approved only after it has passed through the printing and finishing process that represents the intended job. A clean blank surface, matching composition and GSM, or one attractive print is useful evidence, but it does not confirm how the material will handle ink load, drying or curing, normal handling, stretching, mounting or final display conditions.
Why Should Printable Canvas Be Tested Before a Bulk Order?
Useful sample approval connects the complete production system:
Printable Canvas + Printer + Ink + RIP and Print Settings + Drying or Curing + Finishing + Final Application
This matters because a visible defect may come from the media, coating, ink, printer condition, profile, ink load, environment, finishing process or an interaction between several variables. A controlled test helps identify whether the sample is suitable and creates a clear reference for the bulk order.
Three different approvals are often treated as if they mean the same thing:
- Specification approval confirms the stated material, nominal GSM, width, finish, printing system and other agreed product details.
- Visual approval confirms that the blank and printed surfaces look acceptable under the conditions used for inspection.
- Production approval confirms that the identified sample produces an acceptable result through the intended printing, handling and finishing workflow.
For a B2B order, production approval is the useful target. Two canvas products with similar basic specifications can behave differently because their fabric construction, texture, coating and surface response are not necessarily identical. Printer settings that work for one product may also need adjustment for another.
Before testing, confirm that the sample belongs to the correct printable canvas roll type for the intended ink system and application. If the printer or ink system is still being selected, use Gowin’s guide to choose a printable canvas roll for the intended printer and ink system before sample approval.
Step 1 – Confirm the Sample Is the Product You Intend to Buy
Begin by matching the sample to the commercial specification. Record the supplier, product model, material composition, nominal GSM, sample width, surface finish and intended printing system. If the supplier provides a batch, coating or sample reference, record that information as well.
Traceability prevents a common approval problem: a swatch is accepted, but the later purchase order refers only to a general description such as “300gsm matte canvas.” That description may not uniquely identify the tested construction. The approved sample and the order specification should point to the same product.
If roll length, core or packing affects production, warehousing or printer loading, confirm those order details separately. A small sample may not demonstrate the behavior of a complete production roll.
Step 2 – Inspect the Blank Canvas Before Printing
Inspect the printable face under even light before loading it. Look across several areas rather than judging one small section.
- Check surface and coating uniformity.
- Look for contamination, marks, creases or pressure damage.
- Inspect the edges for fraying, damage or an uneven cut.
- Look for obvious weaving defects or local texture changes.
- Place the sample flat and note strong curl, waves or distortion.
- Compare different parts of the sample for visible consistency.
Do not turn this inspection into an invented universal tolerance. The practical question is whether a visible condition could affect loading, printing, finishing or the appearance expected for the finished product. Storage and transport can also affect sample condition, so note how the material arrived and how it was handled before testing.
Step 3 – Print a Controlled Test File
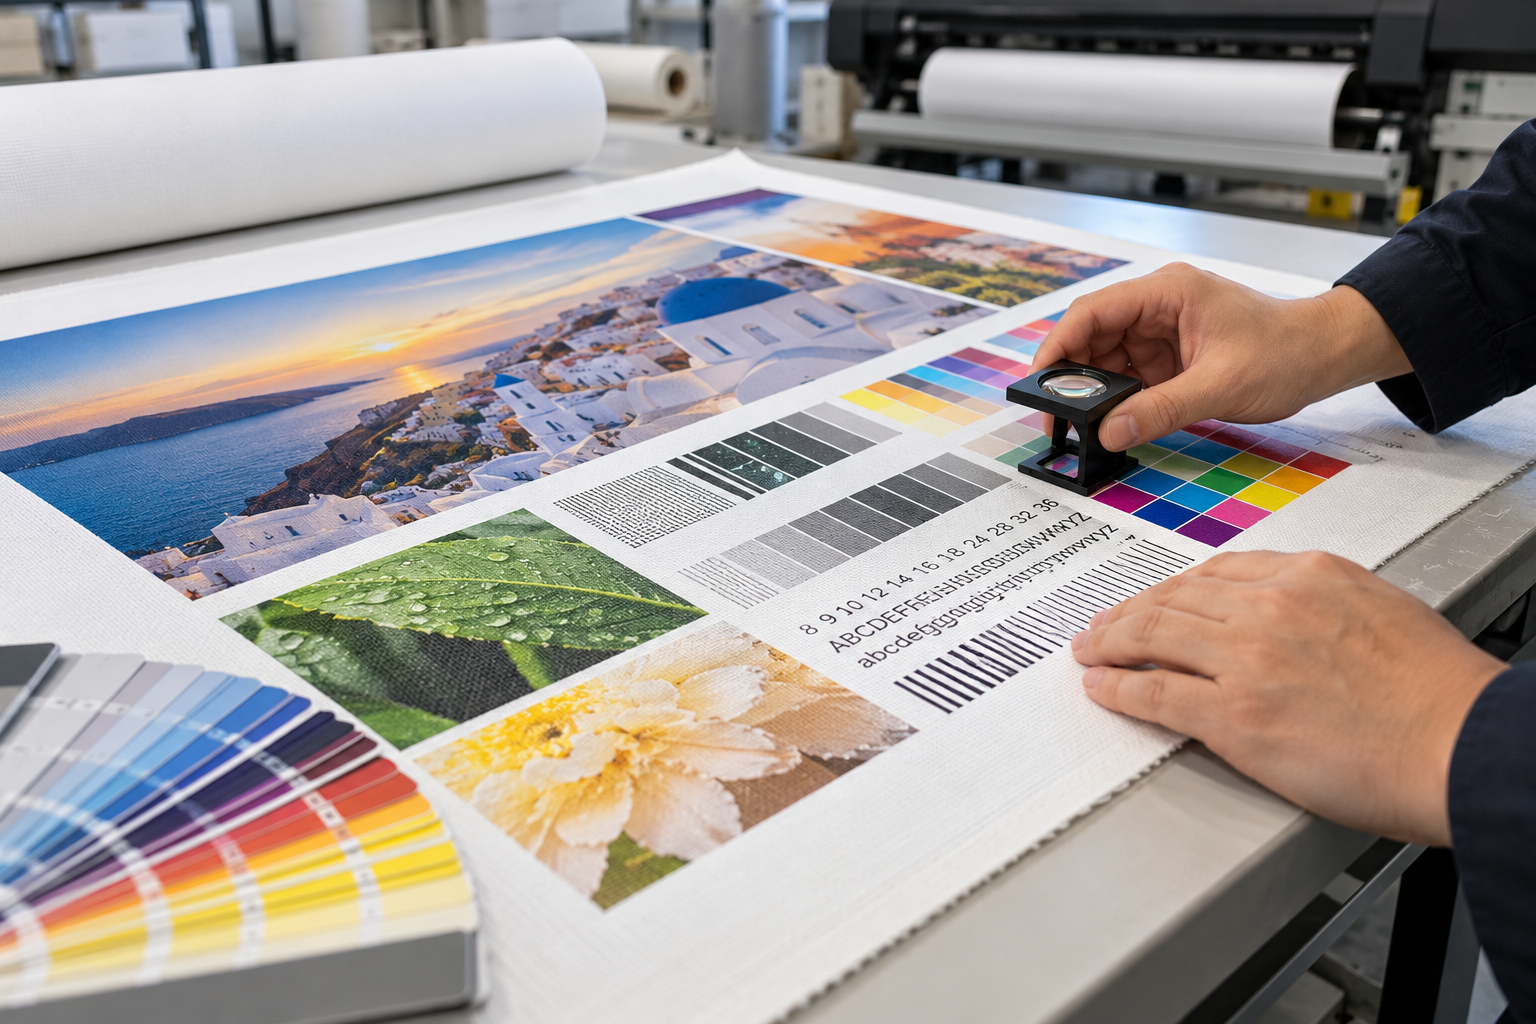
A colorful photograph can look impressive while hiding weaknesses in fine detail, neutral tones or large solid areas. Use a repeatable test file that challenges the characteristics relevant to your production.
| Test Element | What It Can Reveal |
|---|---|
| Fine lines and small text | Sharpness, feathering, spreading and loss of detail |
| Solid black and dark areas | Ink-load response, density, mottling and surface marks |
| Neutral gray | Unexpected color bias and uneven tonal appearance |
| Smooth gradients | Banding, abrupt tonal changes and uneven output |
| Saturated colors and sharp boundaries | Color-to-color bleeding and edge control |
| Skin tones or detailed photographs | Application-relevant detail, tonal transitions and texture interaction |
Print the same test file when comparing samples. Record the printer, ink, media preset or RIP setup, profile, print mode and any relevant adjustment. If several settings are being evaluated, label each print so the result remains traceable.
Step 4 – Check Sharpness, Ink Bleeding and Fine Detail
Examine fine lines, small text and sharp color boundaries at a consistent viewing distance. Look for feathered edges, ink spreading into the canvas texture, filled-in small openings and loss of separation between adjacent colors.
Visible spreading does not automatically prove that the coating is defective. Excessive ink load, an unsuitable media preset, printer condition, the ink system or environmental conditions can produce similar symptoms. Keep the canvas constant while checking the printing variables. Gowin’s guide to ink bleeding and spreading on printable canvas explains how to separate these possible causes.
Step 5 – Evaluate Color Density and Uniformity
Use the solid black, dark colors, neutral gray, gradients and saturated patches to evaluate whether the print is reasonably uniform for the intended product. Look for mottling, uneven absorption, weak or cloudy dark areas, washed-out color and unexpected density changes across the sample.
Color should be judged with the printing conditions recorded. A canvas cannot be expected to deliver universal color from every printer and profile. If the comparison uses different settings for each sample, document them; otherwise, a setting change may be mistaken for a material difference.
An ICC profile supports color management, but it does not replace media qualification. If the ink load or print mode is physically unsuitable for the canvas, profiling alone cannot repair bleeding, poor drying, weak adhesion or coating damage.
Step 6 – Check the Back of the Canvas
Turn the print over after printing high-density areas. The reverse side may show ink penetration, strike-through or uneven migration below dark sections of the image. Compare the location of any visible marks with the test file.
A mark on the back is not automatically a failure. Some constructions are more open or translucent than others, and the importance depends on the finished product. The useful question is whether the observed penetration affects drying, handling, appearance, mounting or the agreed application.
Step 7 – Allow the Print to Dry or Cure Properly
Immediate inspection can give a misleading result. Ink may still feel soft, transfer during handling or change in surface appearance before it has dried or cured under the relevant printer and ink conditions.
Water-based, eco-solvent, latex and UV systems do not stabilize in the same way. Follow the guidance for the actual printer, ink and media workflow rather than applying one universal waiting time. Record when the sample was printed and when adhesion, rubbing or finishing checks were performed.
If the print will be varnished, coated, stacked, rolled, cut or stretched, allow the appropriate process stage to finish before testing the next operation. A sample that is handled too early may fail for reasons unrelated to the canvas specification.
Step 8 – Test Surface Adhesion and Handling Resistance
Handle the dried or cured print in the way it will be handled during normal production. Check whether light rubbing, trimming, stacking, mounting or other realistic contact creates unacceptable marking, ink transfer, scratching or surface damage.
The test should represent the actual workflow without becoming an improvised destructive test. Use the same method when comparing samples, record the conditions and distinguish damage to the ink layer from damage to the coating or fabric below it.
If the surface is sensitive, review ink load, drying or curing, handling method and finishing compatibility before assigning the cause. When the same defect repeats on one material under controlled conditions but not on a comparison sample, the evidence becomes more useful for supplier investigation.
Step 9 – Test the Canvas Through the Real Finishing Process
If the finished product will be stretched, mounted, folded around an edge or gallery wrapped, perform that operation on the printed sample. Flat print approval does not test the mechanical stress created during finishing.
Inspect the face, wrapped edges and corners for cracking, whitening, coating damage, flaking, gloss change or print loss caused by bending and tension. Use the intended frame profile and a representative image, including dark printed areas where small breaks are easier to see.
Good flat print performance does not automatically mean good finished-product performance. The article Why Does Printed Canvas Crack or Turn White When Stretched? provides a focused diagnostic guide for problems that appear during this stage.
Step 10 – Compare the Sample Under Real Viewing Conditions
Evaluate the finished sample in lighting and at a viewing distance that represent the intended use. Directional lighting can make reflections, texture and surface variation more visible. A finish that looks controlled under diffuse workshop light may look different near windows, spotlights or retail lighting.
Compare matte, satin or glossy appearance as a presentation choice rather than a universal quality ranking. If finish is still being selected, review Gowin’s matte vs glossy printable canvas guide and test the shortlisted surfaces with the same artwork.
Step 11 – Record the Approved Sample and Settings
Keep a concise approval record that links the physical sample to the defined production conditions. Useful information includes:
- Supplier and product model
- Batch, coating or sample reference where available
- Material, nominal GSM, width and finish
- Printer and ink system
- RIP, profile, media preset and print mode
- Test date and relevant environmental observations
- Drying or curing stage before evaluation
- Finishing method and inspection results
- Approved physical sample or labelled print where practical
An approved sample should identify the material and the conditions under which it produced an acceptable result for the intended application. This record gives purchasing, production, QC and the supplier a common reference for the bulk order, repeat orders, troubleshooting and any later specification change.
Printable Canvas Sample Approval Checklist
| Test Area | What to Check | Why It Matters | Result / Notes |
|---|---|---|---|
| Sample identity | Model, material, GSM, width, finish and reference | Connects the approved sample to the purchase specification | |
| Blank surface | Uniformity, defects, contamination, creases, edges and curl | Finds visible issues before printer variables are introduced | |
| Controlled print | Fine detail, text, dark areas, gray, gradients and saturated colors | Tests more than one attractive photograph | |
| Sharpness | Edges, feathering, spreading and detail retention | Shows whether fine content remains defined | |
| Density and uniformity | Black, solid colors, mottling and tonal consistency | Reveals uneven output or unsuitable ink load | |
| Reverse side | Penetration, strike-through and high-density areas | Checks whether ink behavior affects the final construction | |
| Drying or curing | Surface condition after the relevant process stage | Prevents premature handling from distorting the result | |
| Handling and adhesion | Rubbing, trimming, scratching and ink transfer in normal production | Checks resistance to the planned workflow | |
| Finishing | Stretching, mounting, edges, corners, cracking and whitening | Confirms finished-product performance | |
| Final viewing | Finish, reflection, texture and appearance in representative light | Confirms presentation under intended display conditions | |
| Approval record | Sample, settings, observations and decision | Creates a reference for production and repeat orders |
What Should You Do If the Sample Fails?
Start with controlled troubleshooting rather than assigning fault immediately. Confirm printer condition, loading and maintenance. Check that the ink, profile, media preset, print mode and ink load match the intended test. Repeat the same file under documented conditions.
If possible, compare another media sample while keeping the printer and settings controlled, or compare the same canvas with one carefully selected setting change. Change one variable at a time. If ink load, heater settings, profile and canvas are all changed together, the next print may look different without showing which change mattered.
Photograph the complete print and close-ups of the defect. Record where it occurs, the affected colors or test elements, the printer and ink, settings, drying or curing stage and finishing method. Send this evidence to the supplier. If repeated results point toward the material or coating, request investigation and a revised sample for comparison.
Should You Approve Bulk Production After One Successful Print?
One successful print is evidence, but approval also depends on whether the result is repeatable and traceable. A meaningful order should refer to the tested product specification and an identifiable approved sample. The production team should be able to reproduce the recorded setup, and the supplier should understand which material reference was accepted.
The necessary level of confirmation depends on order value, application risk and how sensitive the workflow is to media changes. There is no universal number of test prints or batches. The objective is to avoid approving an attractive but unrepeatable result.
Frequently Asked Questions
Is a printer compatibility statement enough to approve printable canvas?
No. Compatibility is a useful starting point, but the result still depends on the printer model, ink, profile, print mode, ink load, drying or curing and finishing process. Test the identified sample under representative production conditions.
Does ink bleeding always mean the canvas coating is defective?
No. Ink bleeding can also be related to ink load, media preset, printer condition, ink chemistry, settings or environmental conditions. Control the variables and compare repeat results before reaching a conclusion.
Should I use my normal ICC profile when testing a new canvas?
Your normal profile can provide a useful baseline if it is appropriate for a similar media type, but record exactly what was used. A profile controls color management; it does not correct fundamental problems with ink load, drying, adhesion or physical media compatibility. A dedicated or adjusted setup may be needed after the basic media test.
What should I keep after approving a sample?
Keep the supplier and product reference, recorded print settings, test observations and a labelled approved print or physical sample where practical. These items form the reference for the purchase order, bulk production and later repeat orders.
Request a Printable Canvas Sample from Gowin
When requesting a printable canvas sample, provide your printer model, ink system, required width, final application, finishing method, estimated order quantity and destination. This information helps narrow the relevant canvas options and prepares a more useful sample discussion.
Test the sample with your own or representative printer, ink, settings and finishing process before approving bulk production.